
Installation
Installation
After you downloaded the Self-Extracting-Archive from our Nextcloud instance you can decide where you want to Install Playnite.
To Extract the Portable installation of Playnite in a Restricted Folder you need to have Administration Access!
Extract to ProgramFiles RECOMMENDED!
This method is recommended but needs elevated permissions for the next steps!
The recommended Option to extract Playnite to your ProgramFiles is a obvious choice and works very Good.
- Locate your Downloads Folder
- Right-Click the downloaded file and select "Run as Administrator"
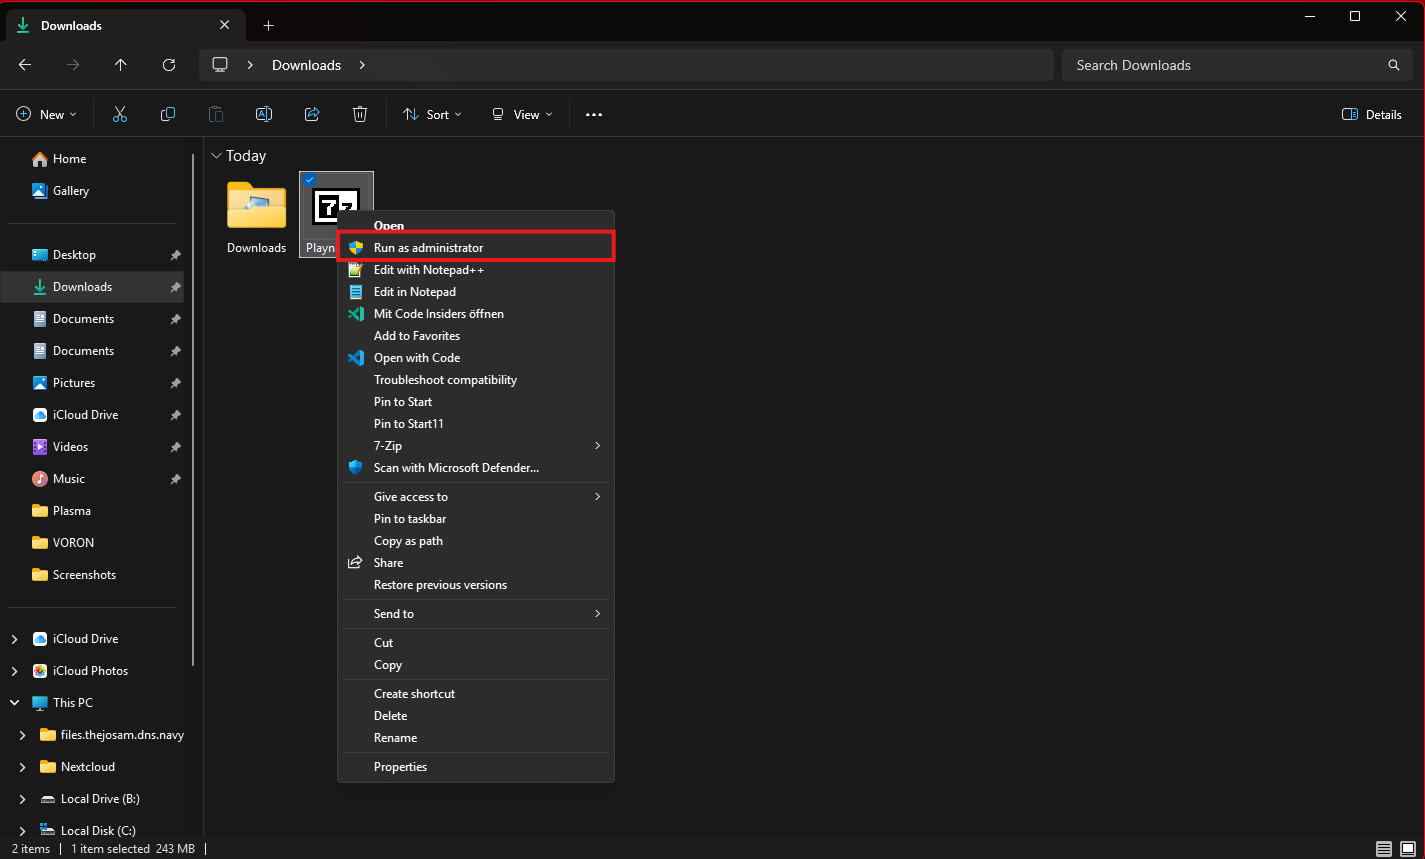
- Now you should see the Dialog below
- Insert the ProgramFiles path (should be the Path shown below)
-> you can use the three dots on the right to do so if you don't know if this is the Correct Path - Click "Extract" to start the Extraction process this can take some Minutes
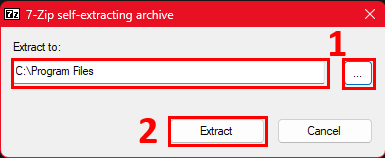
- Insert the ProgramFiles path (should be the Path shown below)
- If you still see the Extract Dialog from 7zip you need to click on "Close"


Now you have extracted the Playnite Installation in your ProgramFiles now if you cannot install it there or you want to have a bit more Control where the files are stored you can use the Extract to Custom Location section.
Extract to Custom Location
This Option is not Recommended and should only be used if ProgramFiles is not available!
This Option gives you a bit more control as you can decide where the Program Files for Playnite will reside and you don't need to have the Full Administration Access to your Machine.
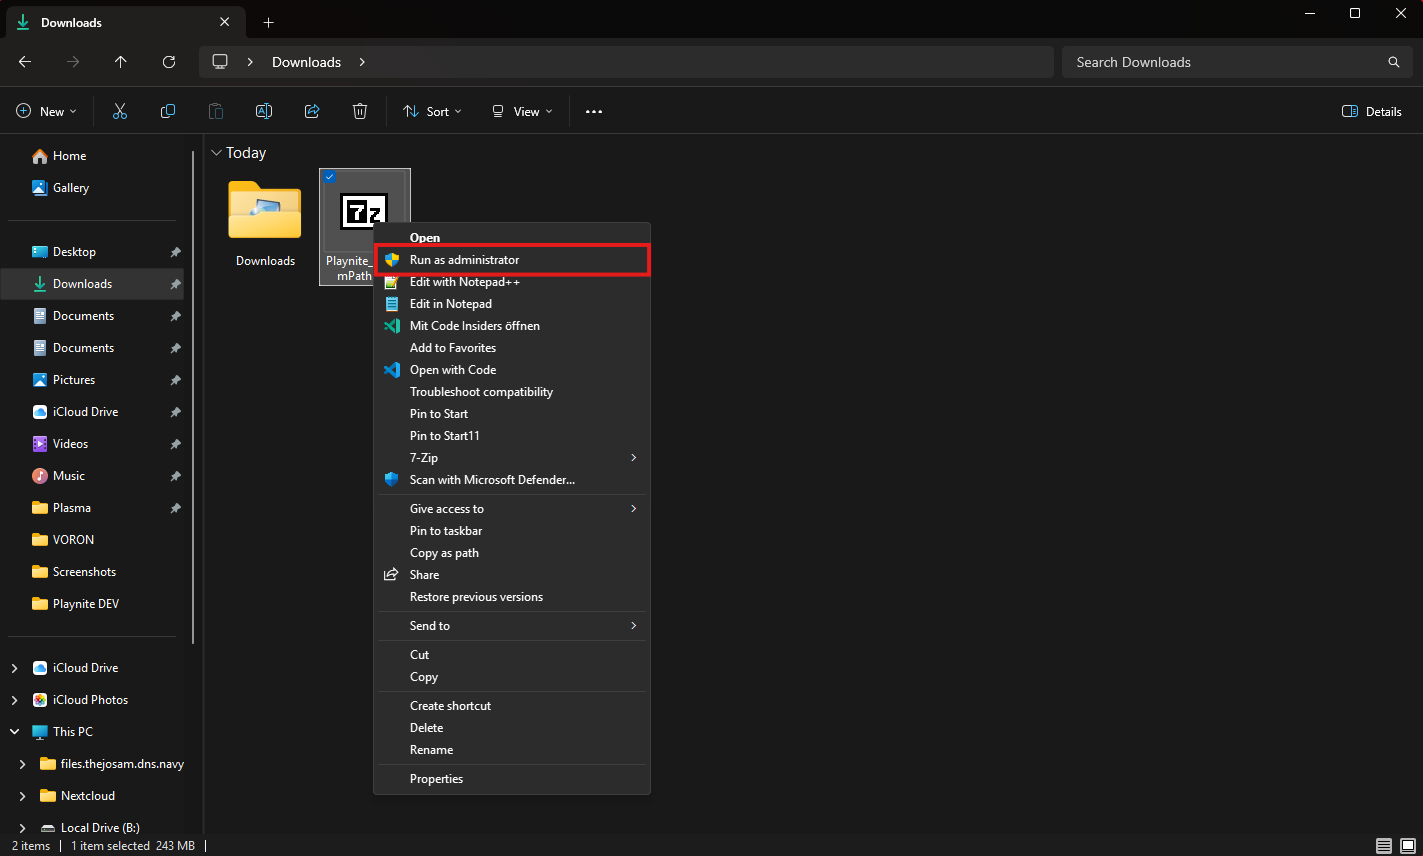
- Locate your Downloads Folder
- Double Click the Playnite.exe file or Right-Click and select "Open"
Your inserted FilePath must be the Final Folder as the CustomPath version of the Archive extracts Programm files directly
- You should now see the Dialog below:
- Insert the your own FilePath in the "Extract to: " line
-> you can use the three dots on the right to do so if you don't know the Path or have it copied - Click "Extract" to start the Extraction process this can take some Minutes
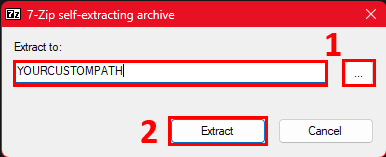
- Insert the your own FilePath in the "Extract to: " line
- If you still see the Extract Dialog from 7zip you need to click on "Close"
You have now extracted the Playnite installation to your own Path and have complete control over your files.
What to do after Installation
Shortcut
For this Step you will need Administration Access to the Machine
To open Playnite from your Startmenu or the Autostart you need to add an Shortcut.
- Open your Playnite Program files Folder in Windows Explorer
- Locate the Playnite Desktop and Playnite Fullscreen Executables
- Starting with the Playnite Desktop Executable
- Right-Click the Executable
- Click on "Create Shortcut" (here "Verknüpfung erstellen)
- If you are asked to create it on your Desktop click on "Yes"
- Locate your Shortcut (eighter on your Desktop or Playnite's Folder)
- Rename your Shortcut to Playnite
- Open the Startmenu Folder in your Program Data > "C:\ProgramData\Microsoft\Windows\Start Menu\Programs"
- Create an Folder with the name "Playnite" and open it
- Insert your Shortcut into the Folder (Copy and Paste no drag&drop)
- Repeat the Steps for Playnite Fullscreen
Autostart
For this Step you will need Administration Access to the Machine
If you want to add Playnite to your Autostart, follow these steps: